How to Scan to PDF?
Introduction
A PDF file is the perfect copy of the original document and it can be transmitted and viewed easily. So why not start to scan your paper documents which contain pictures, signatures and text into PDF with Freemore Scan to PDF to archive or share electronically.
Step 1. Activate Scanner
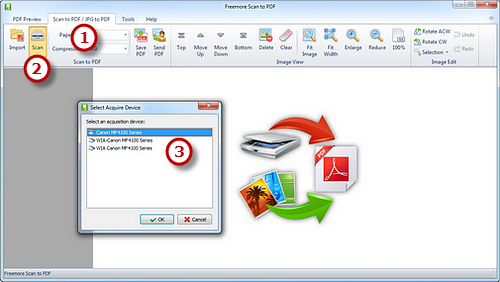
Launch Freemore Scan to PDF and place your document on the scanner bed. Be sure it is as straight as possible. Click "Scan to PDF/JPG to PDF" tab (1) and then click "Scan..." (2) to choose a scanner (3) connected to your computer and activate the scanner program.

Step 2. Scan the Document
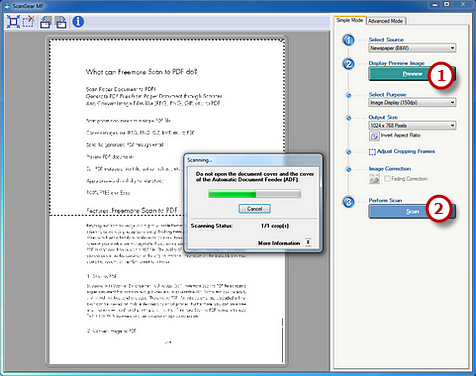
You may click "Preview" (1) to see the image to be scanned. Then click "Scan" (2) to perform scanning.

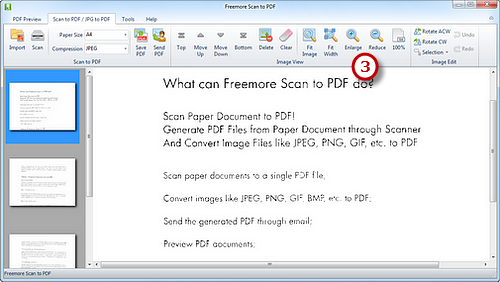
Several seconds later, the image is scanned to the program window. Click "Fit Image", "Fit Width", "Enlarge" and "Reduce" (3) to adjust the image to the right size. If needed, click "Rotate ACW" or "Rotate CW" to correct it to the up-right position. Drag your mouse to select a part of the image to crop, copy and delete. You are allowed to scan multiple images and their thumbnails will be displayed on the previewer window. Use "Top/Bottom/Move Up/Move Down" to arrange the files order and "Delete/Clear" to remove the unwanted image as needed.

Step 3. Save Images to PDF
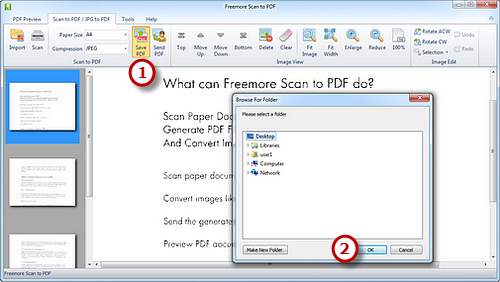
Select Page Size (A0-6, B5, Letter (8.5" × 11"), Legal (8.5" × 14"), ledger (17" × 11")) and Compression (RLE, G3Fax, G4Fax, JPEG). Click "Save PDF" (1) to choose the output folder and then "OK" (2) to convert these scanned images to PDF.

