How to Convert DRM Protected WMA?
- Introduction
- Step 1. Select Recording Device & Sound Source
- Step 2. Adjust Recording Settings
- Step 3. Start Recording
Introduction
Tired of being limited by DRM copy-protection? Freemore Audio Recorder can easily convert your copy-protected music to unprotected audio files by recording them while they are being played.
Step 1. Select Recording Device & Sound Source
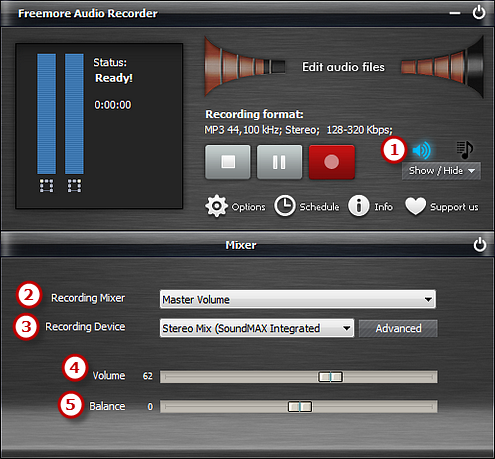
Launch Freemore Audio Recorder. Click "Show Mixer Window" button (1) to select the sound card (2) in your system and choose "Stereo Mix (SoundMAX Intergrated)" (3) as sound source. You can adjust the Volume (4) & Balance (5).

Step 2. Adjust Recording Settings
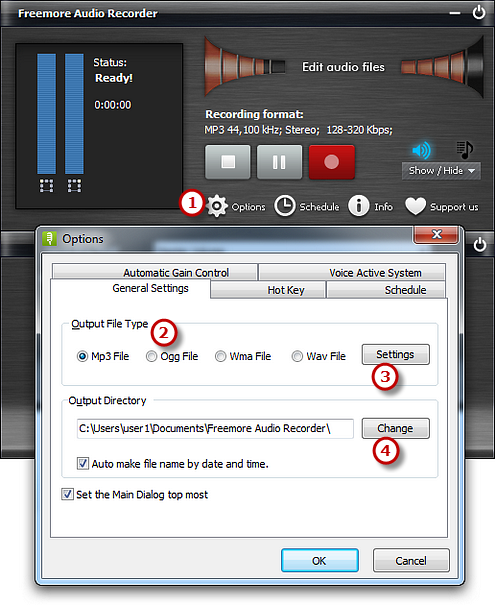
Click "Options" (1) and a window will be activated. In "General Settings" tab, you can specify an output format among MP3, WAV, WMA and OGG (2). Click "Settings" (3) to adjust the recording quality by well-configured presets or configuration parameters. Click "Change" (4) to select an output folder. Other settings like AGC, VAS, Hot Key and Schedule are also available.

Step 3. Start Recording
After everything is set, just play the DRM protected WMA
files that you want to record. Then you can see wave variations
in the wave pattern. If the volume is too low, you can see only
very small variations in the wave pattern. If the sound is being
clipped off because the volume is too high, move the volume
setting down until most of the volume range is displayed without
clipping.
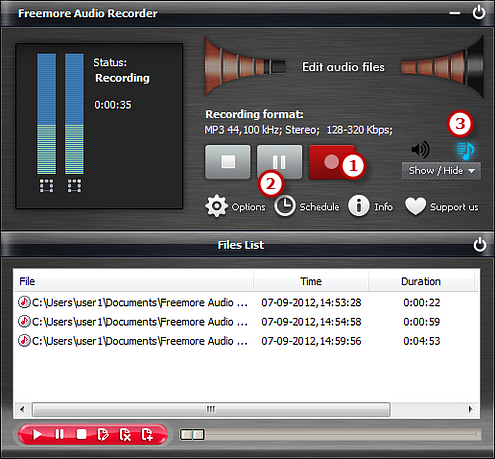
Click the red round record button (1) in Freemore
Audio Recorder or press the hotkey you just set to start recording.
Click "Stop Recording" (2) to stop the recording
and the recorded sound will be directly output to the output
folder. Click "Show file list window" (3) and
you will see the detailed information of the recording like
filename, location, time, duration & size. You can play
the recording with the built-in player.

